Creating a basic MCQ website where you can add questions and answers without relying on plugins typically involves developing a custom web application. You would need to have some knowledge of web development, and programming languages like HTML, CSS, and JavaScript.
In this article, we will give you some CSS code, HTML code, and some JavaScript code with which you can create an MCQ website in your WordPress website. For this, you don’t need to use any WordPress plugin first we know what the MCQ website is?
What is the MCQ Website
MCQ stands for Multiple Choice Questions. An “MCQ website” typically refers to a website that provides multiple-choice questions and answers on various topics. These websites are often used for educational purposes, exam preparation, and self-assessment. Users can access the website to practice answering multiple-choice questions to test their knowledge and understanding of a particular subject.
MCQ websites can cover a wide range of topics, including mathematics, science, history, literature, technology, and more. They may offer questions for various levels of difficulty and provide explanations or feedback for the correct answers to help users learn and improve their knowledge.
Some MCQ websites are free to use, while others may require a subscription or payment for access to a larger database of questions and additional features. These websites are commonly used by students, teachers, and professionals seeking to enhance their knowledge and test their comprehension of specific subjects.
Add Additional CSS
- Login to your WordPress dashboard.
- Go to Appearance and click on Customization.
- Under Customization, scroll down, click on Additional CSS, and paste the given CSS code.
- Finally, click on Publish.
- Clear your cache and refresh.
.acc {
    background-color: #2e2d2d;
    color: #ffffff;
    cursor: pointer;
    padding: 7px;
    width: 110px;
    border: 7px;
    text-align: center;
    outline: 1px;
    font-size: 15px;
    transition: 0.4s;
    margin: 10px;
}

.active, .acc:hover {
  background-color: #ccc;
}

.pnl {
  padding: 0 18px;
  display: none;
  background-color: white;
  overflow: hidden;
}
- Copy the above code
- Go to WordPress Dashboard >> Appearance >> Theme Editor
- Paste the copied code exactly between <body> and </body> tag
- Now save this task using the Update File button in Theme Editor
<script>
var acc = document.getElementsByClassName("acc");
var i;
for (i = 0; i < acc.length; i++) {
acc[i].addEventListener("click", function() {
this.classList.toggle("active");
var pnl = this.nextElementSibling;
if (pnl.style.display === "block") {
pnl.style.display = "none";
} else {
pnl.style.display = "block";
}
});
}
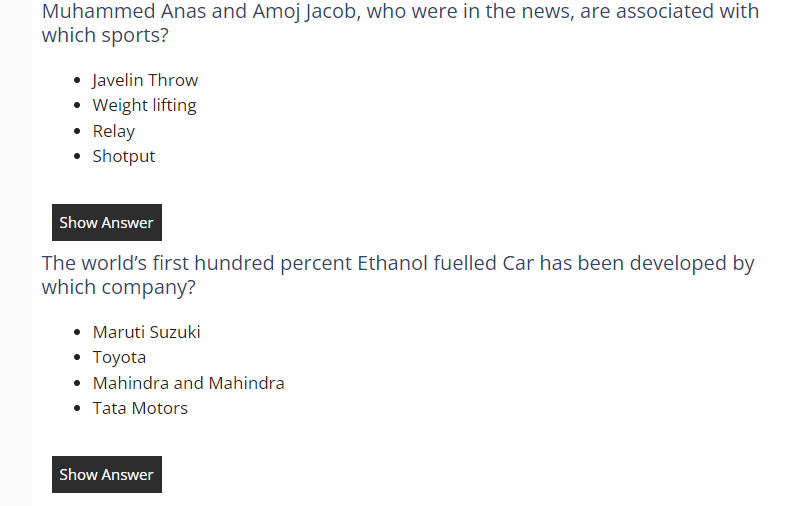
</script>How to add MCQ to a WordPress website with a show answer button
- Go to the Dashboard of your WordPress website
- Go to that post where you want to add MCQ
- Enter your question here with multiple options
- Click on the Add Block button at the extreme end of the block.
- Select the Custom HTML option from the list.
- Go to the new Block by pressing the Enter button.
- Copy the above code and paste it into that Custom HTML section
<button class="acc">Show Answer</button>
<div class="pnl">
  <p></p>
</div>
Hope you are able to create a MCQ website with these codes and if you have any questions then please comment and let us know I will try to answer all your questions.


Great beat ! I wish to apprentice while you amend your site, how can i subscribe for a weblog site? The account aided me a acceptable deal. I had been tiny bit acquainted of this your broadcast provided brilliant clear concept.